In this article, we will find something out about how to create JavaFX project with Maven. It will help us improving productivity, performance when we can program automatically small task with desktop applications.
Let’s get started.
Table of contents
What is JavaFX
According to wikipedia.com, we have:
JavaFX is a software platform for creating and delivering desktop applications, as well as rich Internet applications that can run across a wide variety of devices.

JavaFX is intended to replace Swing as the standard GUI library for Java SE, but both will be included for the foreseeable future. JavaFX has support for desktop computers and web browsers on Microsoft Windows, Linux, and macOS. Since the JDK 11 release in 2018, JavaFX is part of the open-source OpenJDK, under the OpenJFX project.

Oracle 'Premier Support' for JavaFX is also available, for the current long-term version (Java JDK 8), through March 2022.
Creating JavaFX Project with Maven
-
Use
archetypein maven to create projectWhen we refer to this link, we can find that there are so many packages for JavaFX. But in this section, we need to focus on two archetypes that are supported by Maven.
They include:
-
<dependency> <groupId>org.openjfx</groupId> <artifactId>javafx-archetype-fxml</artifactId> <version>0.0.3</version> </dependency> -
  <dependency>
      <groupId>org.openjfx</groupId>
      <artifactId>javafx-archetype-simple</artifactId>
      <version>0.0.3</version>
  </dependency>
Both archetypes for JavaFX have three version, from
0.0.1to0.0.3.So, in our project, we find that
javafx-archetype-fxmldoes not belong to current archetypes of Maven. So, we need to addjavafx-archetype-fxmlin our Maven.First, select
File -> New -> Project -> Maven, and enableCreate from archetype.If the JavaFX
javafx-archetype-fxmlhas not installed yet, selectAdd archetype ..., and fill information to follow a below dialog: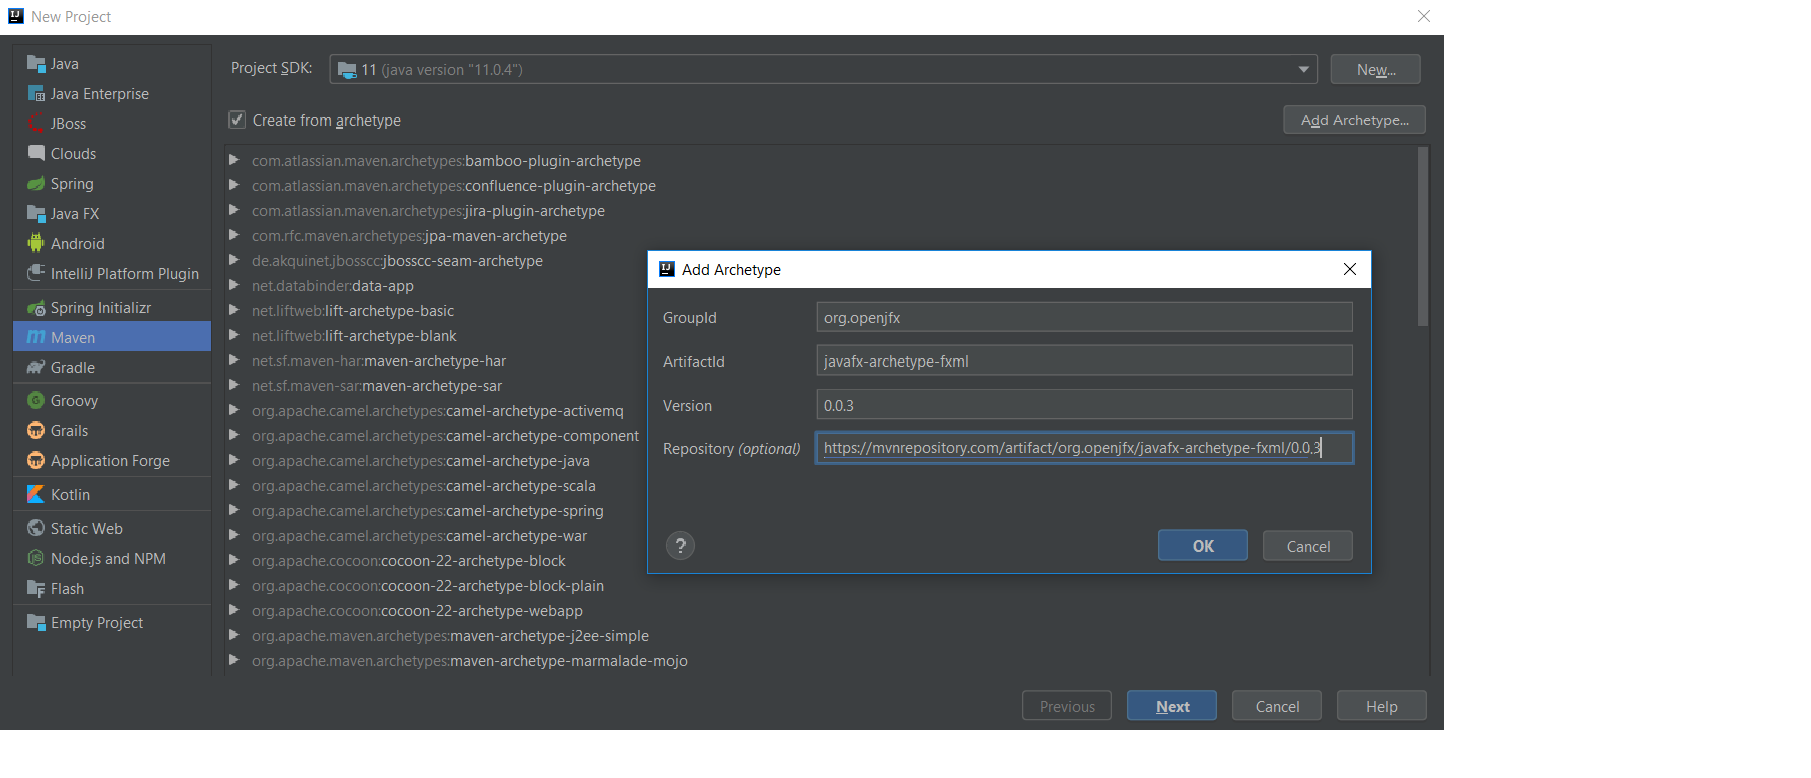
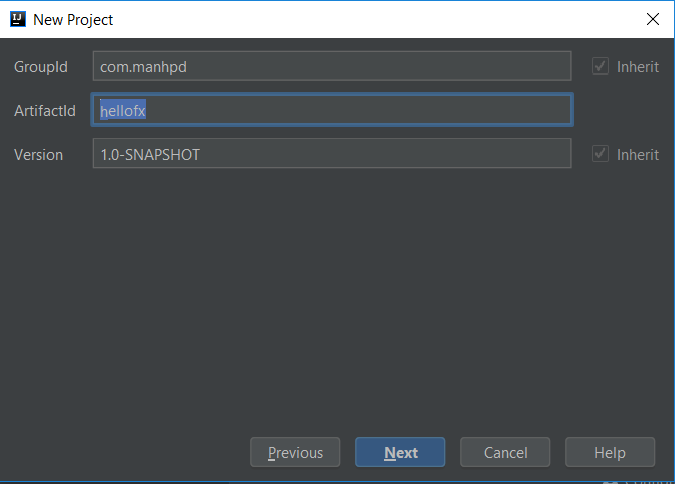
Once installed, select this artifact, and Next button.
-
-
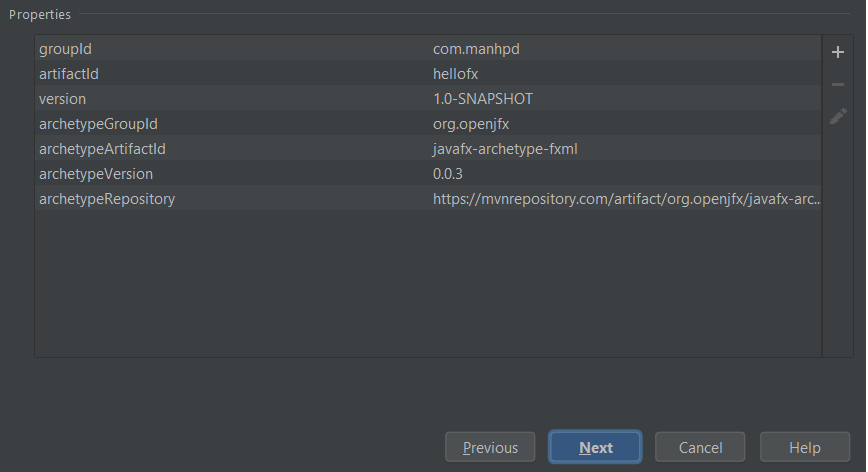
Create groupId, artifactId, version for our project and confirm again
-
After finishing to creat javafx project, move on
pom.xmlfile.First, we can see the structure of javafx project with Maven:

Second, content of
pom.xmlfile:<project xmlns="http://maven.apache.org/POM/4.0.0" xmlns:xsi="http://www.w3.org/2001/XMLSchema-instance" xsi:schemaLocation="http://maven.apache.org/POM/4.0.0 http://maven.apache.org/maven-v4_0_0.xsd"> <modelVersion>4.0.0</modelVersion> <groupId>com.manhpd</groupId> <artifactId>hellofx</artifactId> <version>1.0-SNAPSHOT</version> <properties> <project.build.sourceEncoding>UTF-8</project.build.sourceEncoding> <maven.compiler.source>11</maven.compiler.source> <maven.compiler.target>11</maven.compiler.target> </properties> <dependencies> <dependency> <groupId>org.openjfx</groupId> <artifactId>javafx-controls</artifactId> <version>13</version> </dependency> <dependency> <groupId>org.openjfx</groupId> <artifactId>javafx-fxml</artifactId> <version>13</version> </dependency> </dependencies> <build> <plugins> <plugin> <groupId>org.apache.maven.plugins</groupId> <artifactId>maven-compiler-plugin</artifactId> <version>3.8.0</version> <configuration> <release>11</release> </configuration> </plugin> <plugin> <groupId>org.openjfx</groupId> <artifactId>javafx-maven-plugin</artifactId> <version>0.0.3</version> <configuration> <mainClass>com.manhpd.App</mainClass> </configuration> </plugin> </plugins> </build> </project>Finally, we also insert some dependencies such as
javafx-graphics, andjavafx-media. -
Run our project
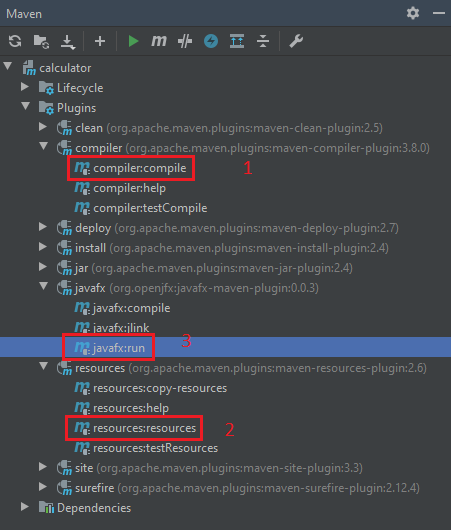
In Maven tab, we choose
Plugins, thencompilerparent in hierarchy project. Selectcompiler:compile.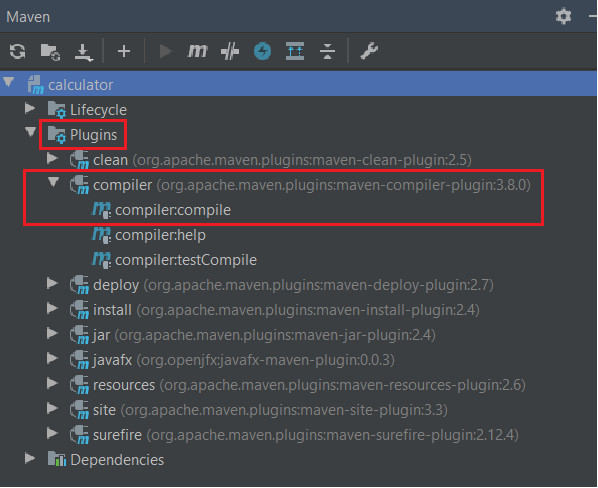
After compiling , we need to run
Plugins -> javafx -> javafx:run.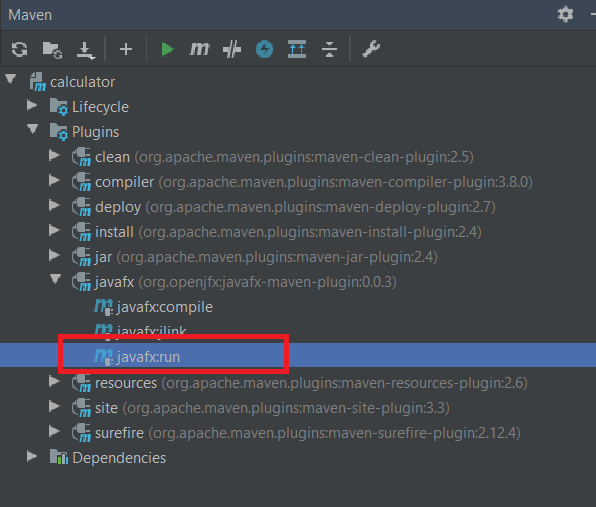
-
Common problems when creating JavaFX project
-
Location is requiredSolution:
-
First way, we can specify the path of our
fxmlfile such as:URL url = new File("src/main/resources/fxml/calculator.fxml").toURI().toURL(); Parent root = FXMLLoader.load(url); -
Second way, we will do the following steps:
-
Assuming that our project have structure and some plugins:
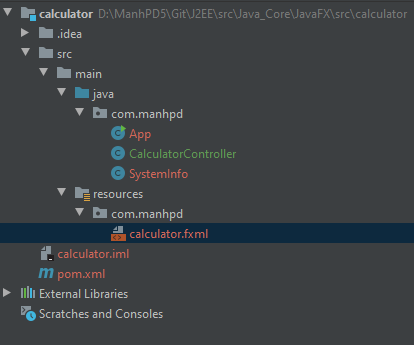
We created
com.manhpdinresourcesfolder to put all.fxmlfiles into the same folder with our source.classfiles.So, in our code, we only need to use relative path in segment code:
getClass().getResource("calculator.fxml"); -
Run
mvn compiler:compileIt belongs to
maven-compiler-plugin.After run this command, we have:
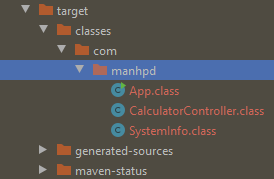
It does not have
calculator.fxmlfile. So, after run commandmvn javafx:run, our program do not find this file, it will throw an exceptionLocation is requiredorNullPointerExceptioningetClass().getResource("calculator.fxml");.So, to solve this problem, we will move on the next steps.
-
Run
mvn resources:resourcesIt belongs to
maven-resources-plugin.Refer to this link.
The Resources Plugin handles the copying of project resources to the output directory.
There are two different kinds of resources: main resources and test resources. The difference is that the main resources are the resources associated to the main source code while the test resources are associated to the test source code.
resources:resourcescopies the resources for the main source code to the main output directory.This goal usually executes automatically, because it is bound by default to the process-resources life-cycle phase. It always uses the
project.build.resourceselement to specify the resources, and by default uses theproject.build.outputDirectoryto specify the copy destination.After running
mvn resources:resources, our built folder can have: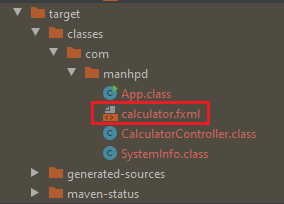
-
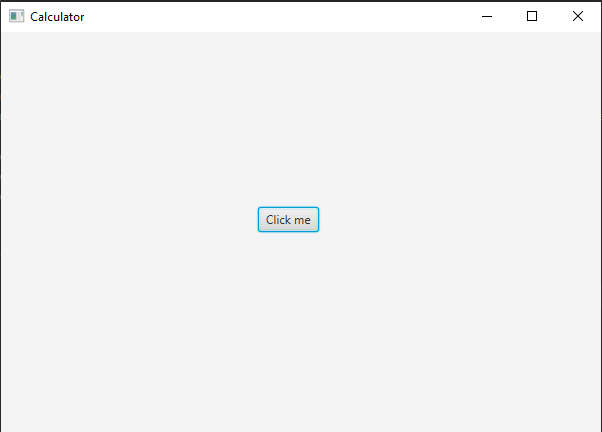
Run
mvn javafx:runWe have result:
-
-
-
Command execution failed.After run all above steps, we can encounter error like a below image:
  Error: Could not create the Java Virtual Machine.
  Error: A fatal exception has occurred. Program will exit.
  Unrecognized option: --module-path
  [ERROR] Command execution failed.
Unrecognized option: --module-pathmeans that you are running with Java 1.8. We need to set JDK 11/12 before runningmvn javafx:run.To fix this problem, we should insert
<configuration><executable>/path/to/jdk-11-12/bin/java</executable></configuration>into javafx-maven-plugin of pom.xml file.<plugin> <groupId>org.openjfx</groupId> <artifactId>javafx-maven-plugin</artifactId> <version>0.0.3</version> <configuration> <mainClass>org.openjfx.App</mainClass> <executable>C:\Program Files\Java\jdk-11.0.4\bin\java</executable> </configuration> </plugin>
Note:
-
getClass().getClassLoader().getResource(...)will load a resource from a path relative to the classpath. Since you placed the FXML file in theapplicationpacakge, you need:Parent root=FXMLLoader.load(getClass().getClassLoader().getResource("application/Main.fxml"));If you just use
getClass().getResource(...), and do not prefix the path with/, it will load from a path relative to the current class. So,Parent root=FXMLLoader.load(getClass().getResource("Main.fxml"));Make sure that our FXML file is being exported to the build folder, along with the
.classfiles.
-
Wrapping up
- Understanding about how to create our javafx project.
Refer:
https://gluonhq.com/products/javafx/
https://openjfx.io/openjfx-docs/#maven
https://github.com/openjfx/samples